 SewMendStitch
Start with the slider, not the teeth
Most zippers that stop closing still have perfectly good teeth. Repeated use can bend or spread the slider (the part you pull) until it no longer presses the two rows together.4 VAUDE estimates about 15 minutes to replace a slider,4 while replacing a whole zipper in a jacket can take an afternoon. Before you unpick anything, work out which part has failed, and for that you need the names of the parts.
Parts of a zipper
YKK, the largest zipper maker, names the parts like this.1 You will see these words on repair kits and replacement listings.
- Tape: the woven fabric strips you sew into the garment.
- Elements (teeth): the interlocking pieces along the edge of each tape.
- Slider: the moving part that joins or separates the elements. It has a body, a pull tab and two wide openings called throats.
- Top stops: small clips at the top of each tape that stop the slider running off.
- Bottom stop: the clip at the base of a closed-end zipper.
- Insert pin and retainer box: on a separating zipper, the pin on one tape slides into the box on the other to start the zip.16
Types: element material and how the ends work
Zippers are grouped by what the elements are made of.1
| Type | Elements | Feel and typical use |
|---|---|---|
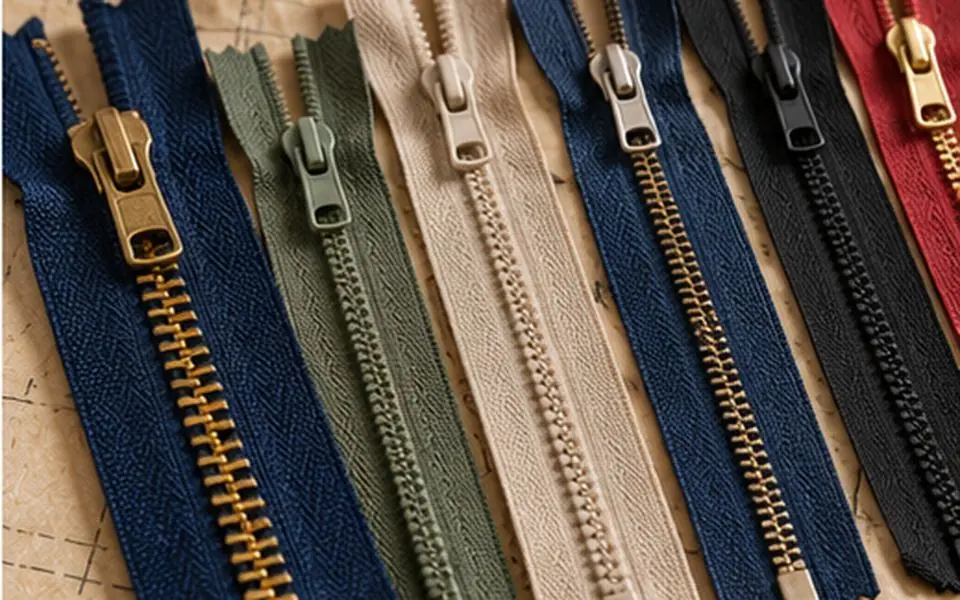
| Coil | A continuous spiral of polyester or nylon | Softest and most flexible; dresses, bags, lightweight jackets |
| Molded plastic (YKK calls it VISLON) | Individual teeth of injected plastic such as polyacetal | Lighter than metal of the same size; outdoor jackets, children's coats |
| Metal | Brass, aluminum or nickel teeth | The oldest type; jeans, heavy jackets, workwear |
| Invisible (concealed) | A coil turned to the inside of the tape | Hidden in a seam; dresses and skirts |
The ends matter too. A closed-end zipper is fixed at the bottom and never comes apart (skirts, trousers, bags). An open-end or separating zipper comes apart completely using the insert pin and box (jackets). A two-way separating zipper has two sliders and can be opened from either end.1
To tell coil from molded plastic, look closely at the teeth. Coil teeth are one continuous spiral running along the tape edge. Molded plastic teeth are separate pieces clamped onto the tape.2 Metal is obvious once you tap it with a fingernail.
What the size numbers mean
A zipper's size number is roughly the width of the closed teeth in millimeters, rounded to the nearest standard size.5 A #5 zipper measures about 5 mm across its closed teeth, and a #3 about 3 mm.2
To find the size, look at the back of the slider. The first number stamped there is usually the size. There may also be a letter: C often marks a coil slider and V a molded plastic one.2 If there is no number, or the slider is missing, close the zipper and measure across the teeth with a ruler marked in millimeters.2
| Size | Approx. tooth width | Weight | Typical garments |
|---|---|---|---|
| #3 | 3 mm (1/8 in) | Light | Dresses, skirts, invisible zippers, small bags5 |
| #5 | 5 mm (3/16 in) | Medium | Trousers, jeans, most jackets and hoodies5 |
| #8 | 8 mm (5/16 in) | Heavy | Heavy jackets, workwear, large bags5 |
| #10 | 10 mm (3/8 in) | Heavy | Heavy outerwear, outdoor gear5 |
Size and type must both match. A slider made for #10 coil works only on #10 coil.6 Coil and molded plastic sliders are not interchangeable even at the same number.2
Fixing a slider that will not close the teeth
Symptom: you pull the slider up and the teeth separate again behind it, but no teeth are missing or bent.
- Check for caught fabric or thread first. Work it free gently while easing the slider back and forth; pliers can help if you go carefully. Patagonia advises against forcing a stuck zipper or adding lubricant.7
- Look at the slider from the side. If the gap at the back (the narrow end) is wider than at the front, the slider has spread.
- As a temporary fix, squeeze the two sides of the slider together with pliers, a little at a time, testing after each squeeze. This often buys weeks or months, but a spread slider usually spreads again. Too much pressure cracks it.
- The lasting fix is a new slider of the same size and type.
Replacing a slider and repairing stops
On a separating zipper, the slider usually comes off at the top. On a zipper where both ends are stopped or sewn into seams, it can be harder, and you may have to replace the whole zipper.6
- Buy a matching slider and a pair of top stops (or a stop kit). Match the size number, the type, and if possible the brand.7
- Pry off one top stop with small wire cutters or flat-nose pliers.4
- Run the old slider off the end and thread the new one on, wide end first, with the pull tab facing out. Start both tapes into the slider evenly so the teeth meet level.
- Zip it up and down a few times to check it closes.
- Fit a new top stop where the old one was and crimp it firmly.4 If you have no stop, a few tight hand stitches over the top two or three teeth (a bar tack) will stop the slider leaving.
- If the pull tab is the only broken part, a key ring or a loop of cord through the slider works until you buy a new pull.
A missing bottom stop on a closed-end zipper is handled the same way: whip stitch tightly over the teeth just above where the slider should stop, using doubled thread. Match the thread to the tape; see choosing thread color.
When the whole zipper must go
Replace the zipper when teeth are missing, broken or bent in a way you cannot straighten, when the tape is torn, when the insert pin or retainer box has broken off a separating zipper, or when coil teeth have been cut. Patagonia suggests professional repair or a full replacement when the teeth are damaged and will not close.7
Basic steps for a skirt or dress (closed-end, in a back or side seam):
- Photograph the zipper in place, then unpick the stitching on both sides and across the bottom. If there is a waistband or facing at the top, open it just enough to free the tape ends.
- Buy the same length or slightly longer. Standard closed-end lengths run from 7 to 22 inches, and a longer zipper can be shortened with two bar tacks about 1/2 inch apart, cutting 1/2 inch below the lower one.3
- Pin and baste the new zipper along the old stitching lines; basting holds it far better than pins. For a lapped zipper, the top stop sits 5/8 inch below the waist seamline.3
- Stitch with a zipper foot, close to the teeth on the first side, then across the bottom, pivot, and up the second side.3 Close any waistband or facing with backstitch or machine stitching.
Basic steps for a jeans fly (closed-end metal):
- Open the waistband just at the front, unpick the fly topstitching, and remove the bar tack at the bottom of the fly.
- Sew the left tape to the fly facing first, following the old stitch line about 1/8 inch from the tape edge.3
- Attach the other tape to the fly shield, then redo the curved topstitching on the right front, following the old holes. NMSU marks this line 1 1/4 inches from the center seam.3 See topstitching.
- Trim the top of the zipper within the waistband seam allowance after stitching across the tape, close the waistband, and put back a firm bar tack at the bottom of the fly.3 Reinforcing stress points shows the bar tack.
Worked example: a jacket zipper
A rain jacket's zipper keeps splitting open below the slider. The slider's back is worn smooth, so no size is readable.
- Type: the teeth are separate plastic pieces, so it is molded plastic. It comes fully apart at the bottom, so it is separating.
- Size: closed, the teeth measure 5 mm across. That makes it a #5.2
- Diagnosis: no teeth are missing, but the slider gap is wider at the back. A new #5 molded plastic slider may solve it.
- If a new slider fails (or teeth are damaged), measure for a full replacement. Close the zipper and measure from the top of the top stop to the bottom of the retainer box: 23 3/4 inches (603 mm). YKK's exact reference points vary a little by zipper type, so measure the old and new zippers the same way.1
- YKK allows a tolerance of plus or minus 15 mm (about 5/8 inch) on zippers between 600 and 1200 mm long.1 A 24 inch (610 mm) separating #5 molded plastic zipper falls within that range, so it is the right one to buy.
Bring the old zipper or the jacket to the shop. Lay the new one alongside the old tape and confirm that the top stops line up within about 1/4 inch before you start unpicking. Changing a jacket zipper is a long job; if the jacket is lined, put aside two to three hours.
Common mistakes
- Buying by length alone. Check the size number, type and ends before you look at length.
- Squeezing the slider too hard. A cracked slider has to be replaced anyway.
- Sewing too close to the teeth. Leave room for the slider body, or it will catch the fabric.
- Replacing a separating zipper with a closed-end one, or the reverse.
- Skipping the bar tack at the bottom of a fly. That stitch takes the strain when you sit.
When you buy a replacement, buy two sliders of that size and type and keep one in your sewing box.
Sources
- Fastening Products Catalogue (zipper parts, types and length tolerances), YKK Americas
- Zipper Identification, iFixit
- Zippers Made Easy (Guide C-221), New Mexico State University Cooperative Extension
- How do I replace the slider of the zipper?, VAUDE
- Zipper Size Chart, WAWAK Sewing Supplies
- Anatomy of a Zipper, Sailrite
- How to Repair a Zipper, Patagonia
Links were checked when this guide was last reviewed. If one has moved, please let us know. How sources are chosen: editorial policy.