 SewMendStitch
The hidden layer that makes collars stand up
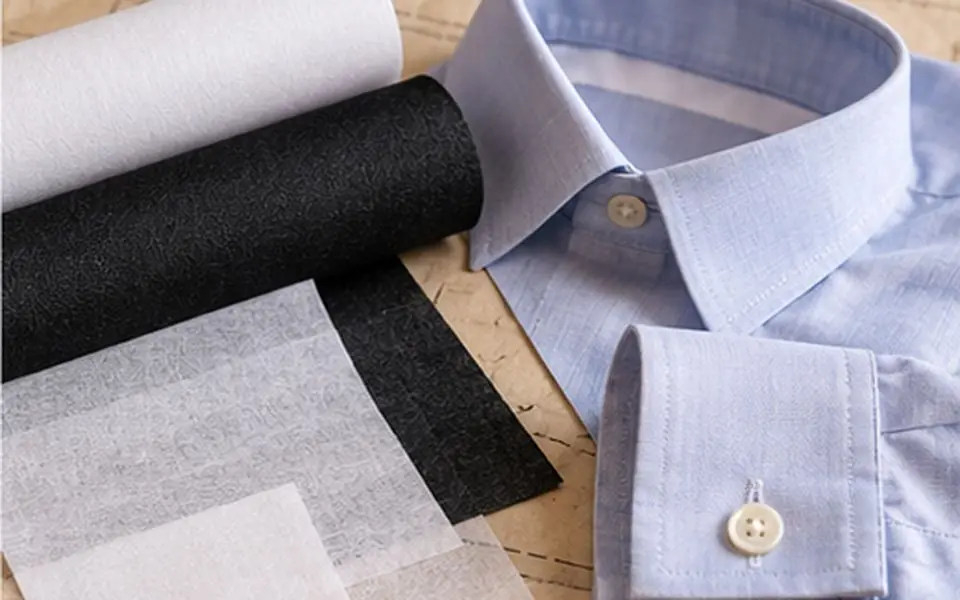
Turn a shop-bought shirt collar inside out and you will find a stiff layer between the two pieces of fabric. That layer is interfacing: a fabric added to the wrong side of the garment fabric to give it body and keep it from stretching out of shape. Washington State University's extension bulletin lists stability, shape and reinforcement as its main jobs, and adds that it keeps trimmed edges from stretching or fraying.1
You will meet interfacing in collars, cuffs, waistbands, button plackets, facings (the pieces that finish a neckline or armhole on the inside) and pocket flaps. The University of Idaho's guide notes that it keeps collars and cuffs firm and stops pockets drooping.3 Without it, a waistband rolls over within a week and buttonholes stretch into slits.
Fusible or sew-in
Fusible interfacing has a heat-activated glue on one side. An iron bonds it to the fabric. Sew-in interfacing has no glue and is basted to the fabric or caught in the seams. University of Missouri's extension guide notes that sew-in types give a softer, more subtle result, and that the choice depends on the fabric and personal preference.2
Most beginners use fusible because it is quicker. Sew-in is the better choice when the fabric cannot take heat or steam, or when glue might show. Missouri advises against fusibles on acetate, pure silk and fabrics with a silicone finish.2 Pellon's 911FF featherweight lists triacetate, lace, seersucker and rainwear as fabrics not to fuse.6 Washington State adds that fusing can flatten napped fabrics like velvet or crinkled finishes.1
To find the glue side of a fusible, look for a slightly rough or shiny surface. Pellon says dot adhesive feels rough and spray adhesive looks shiny; if you cannot tell, press a small sample between two paper towels and see which side sticks.4
Woven, non-woven and knit
There are three constructions, and each feels different in the hand.
| Type | How it is made | Behaviour | Good for |
|---|---|---|---|
| Woven | Threads woven like fabric | Has a grain; drapes like cloth; can be cut on the bias for give | Collars, cuffs, shirt plackets, waistbands |
| Non-woven | Fibres bonded into a sheet | No grain, does not fray, crisper and less drapey | Flat details: tabs, flaps, bags, craft |
| Knit | Knitted, usually fusible | Soft, stretches with the fabric | Knit garments, soft jackets |
The descriptions in that table follow Washington State's bulletin.1 Pellon's SF101 Shape-Flex, a 100% cotton woven fusible, is marketed for collars, cuffs, yokes, pockets and facings on light to medium wovens and knits.5 Its 911FF featherweight is a 100% polyester non-woven fusible for light to midweight fabrics such as chambray, broadcloth and jersey.6 Pellon describes two knit interfacings: a circular knit that stretches in all directions and a tricot knit with crosswise stretch but little lengthwise give.4
On stretch fabric, use an interfacing with about the same give as the fabric, as Idaho's guide advises.3
Choosing the weight
Every extension guide gives the same rule: choose interfacing the same weight as the fabric or lighter, never heavier.13 Interfacing that is too heavy makes the garment stiff and can show as a ridge on the right side. Fusibles get a little stiffer once bonded, because the glue adds body, so test before committing.3
Do a drape test in the shop. Lay one layer of your fabric over one layer of the interfacing and let them hang together over your hand. Then fuse a 4 in by 4 in (10 cm by 10 cm) sample at home and wash it if the garment will be washed, as Washington State recommends.1 Match the colour as well, with white or natural behind light fabrics and charcoal or black behind dark ones.1
Some areas need particular care:
- Collars and cuffs: lighter interfacing on both layers is better than one heavy layer, because it cushions the seam allowances.1 A heavy non-woven inside an enclosed collar can buckle.1
- Waistbands: Washington State suggests a one-way-stretch product cut so the firm direction runs along the length.1 A woven fusible cut on the lengthwise grain does the same job.
- Buttonholes: the interfacing must not stretch along the length of the buttonhole. On knits, cut it so the firm direction follows the buttonhole, or fuse a 1 in (2.5 cm) strip behind the button area.1
- Facings: fuse to the facing, not the garment front, so any edge line stays hidden on the inside.1 Our facings lesson shows where they sit.
Pre-shrinking
If the interfacing and fabric shrink by different amounts in the wash, the interfacing pulls away and bubbles form. Washington State names unshrunk fabric and poor fusing as the causes of bubbles after laundering.1 Pre-wash the garment fabric the way you will wash the finished item.
Interfacing itself is treated differently. Pellon says most of its products do not need pre-shrinking and the interleaf instructions say which ones do. For SF101 it says to soak the interfacing in warm water for about ten minutes, squeeze gently, and let it dry, and warns never to put it through a washer or dryer on its own because the glue can loosen.45 Washington State gives 15 to 20 minutes in warm to hot water for wovens, rolled in a towel and dried flat, and a no-contact steam method for non-wovens: hold the iron 1/2 to 1 in (1 to 2.5 cm) above the interfacing for about 5 seconds.1
How to fuse it properly
Pellon names four conditions for a good bond: heat, steam, time and pressure. Leave one out and the bond may fail.4
- Cut the interfacing to shape. Washington State has about 1/8 in (3 mm) extend into the seam allowance, and diagonal trims of about 1/4 in (6 mm) at corners on fabrics that do not fray.1
- Lay the fabric wrong side up on the ironing board and the interfacing glue side down on top.
- Set the iron to the maker's setting. SF101 calls for the wool setting with steam.5 Vlieseline, the European brand of interfacing maker Freudenberg, says its cotton woven B 700 should be ironed no hotter than 150 C (302 F).7
- Cover with a damp press cloth. Pellon says the spot under the iron should be almost dry when you lift it, which tells you the heat was right.4
- Press straight down. Do not slide. Washington State gives about 10 to 12 seconds for lightweight interfacing and about 15 seconds for heavier types, with firm pressure.1 Vlieseline gives about 15 seconds for the B 700, pressing section by section.7
- Lift, move the iron to overlap the last spot slightly, and press again until the whole piece is done.
- Let it cool flat before moving it. Vlieseline suggests about 30 minutes for the bond to settle.7
Pellon also says a handheld steamer is not a substitute for an iron, because it supplies steam without pressure.4 For more on pressing technique, see pressing as you sew.
Worked example: a replacement waistband
A pair of cotton twill trousers needs a new waistband. The waist measures 34 in (86 cm), the finished band will be 1 1/2 in (3.8 cm) tall, and there is a 2 in (5 cm) underlap for the button. Seam allowances are 5/8 in (1.5 cm).
Cut the waistband fabric: length 34 + 2 + 5/8 + 5/8 = 37 1/4 in (about 94.6 cm). Width is twice the finished height plus two seam allowances: 1 1/2 x 2 + 5/8 x 2 = 4 1/4 in (about 10.8 cm).
Pick the interfacing. Twill is a medium-weight woven, so choose a light to medium woven fusible, cut on the lengthwise grain so it does not stretch along the band. With a 20 in (51 cm) wide product such as SF101,5 the strip has to be cut along the roll, so buy 1 1/8 yd (about 1 m).
Size the strip: take the waistband size, remove the seam allowances, then add back 1/8 in at each edge.1 Length: 37 1/4 - 1 1/4 + 1/4 = 36 1/4 in (92 cm). Width: 4 1/4 - 1 1/4 + 1/4 = 3 1/4 in (8.3 cm). This interfaces the full band, inside and outside, so the fold has support on both halves.
Pre-shrink the strip: 10 minutes in warm water, squeeze gently, dry flat.5 Fuse a 4 in test square to a scrap of the twill first. If it bonds well and looks smooth after cooling, fuse the strip. A typical iron soleplate is about 5 in (13 cm) of usable flat area, so with slight overlaps you will make about eight presses of 12 to 15 seconds each. That is two minutes of pressing, not counting the cool-down. Leave it flat for half an hour, then attach it as shown in the waistband lesson and the seam allowance lesson.
Common mistakes
- Sliding the iron. It shifts the interfacing and leaves wrinkles glued in place.12
- Pressing too briefly, or with a dry iron when the product wants steam. The edges peel after the first wash.
- Fusing to fabric that was not pre-washed. Bubbles appear after laundering.1
- Choosing interfacing heavier than the fabric. The garment turns stiff and a ridge shows through.3
- Putting the glue side up and fusing it to the ironing board cover or the iron. Use a press cloth every time.4
- Machine-washing fusible interfacing on its own to pre-shrink it, which loosens the glue.4
- Storing fusible interfacing for years. Washington State advises buying only what you will use within several months.1
If a small bubble does appear after washing, cover it with a damp press cloth and press firmly for 15 seconds without sliding. A bubble that comes back means the glue has failed, and only new interfacing will fix it for good.
Sources
- Interfacings (EM014), Washington State University Extension
- Tips for Fusing (Home Economics Guide), University of Missouri Cooperative Extension Service
- Interfacing: Selection and Use, University of Idaho Cooperative Extension Service
- Frequently Asked Questions, Pellon
- SF101 Shape-Flex, Pellon
- 911FF Fusible Featherweight, Pellon
- Gewebeeinlage B 700 (woven interfacing), Vlieseline (Freudenberg)
Links were checked when this guide was last reviewed. If one has moved, please let us know. How sources are chosen: editorial policy.