 SewMendStitch
Pressing is not ironing
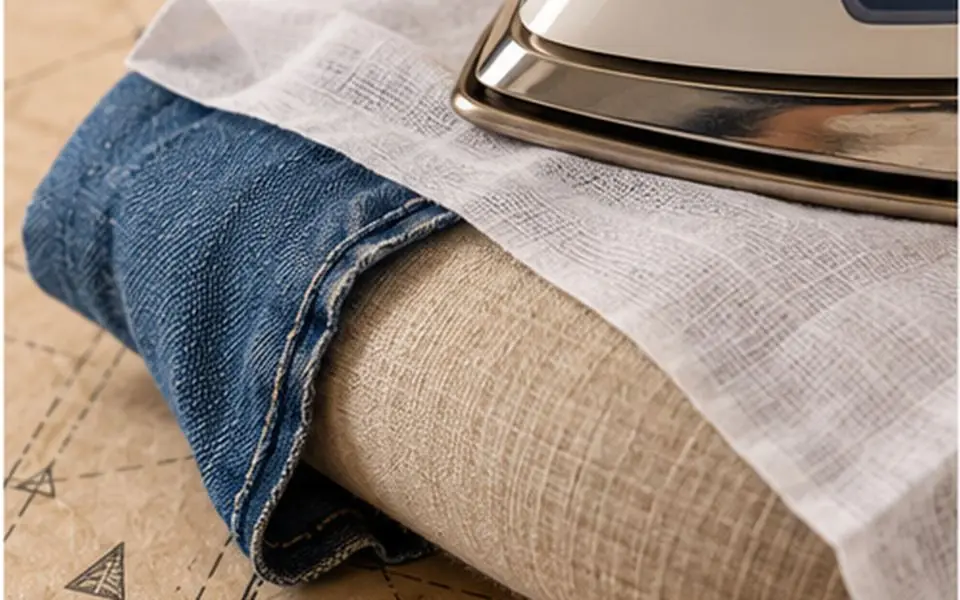
A seam sewn with perfect stitches can still look homemade if it is never pressed, and a wobbly seam often looks fine once it is pressed well. Pressing and ironing use the same appliance but different motions. Ironing slides the iron across cloth to remove wrinkles. Pressing lowers the iron onto one spot, holds it, then lifts it and moves to the next spot.1 Lifting instead of sliding keeps the fabric from stretching, which matters most on curves and knits, and on bias edges (edges cut on a diagonal to the weave).
Nearly all pressing during sewing happens on the wrong side of the fabric, the side that will be hidden when the garment is worn.1 You press after almost every step. A seam is pressed to set it, pressed again open or to one side, and pressed once more before another line of stitching crosses it. The basic motion is shown in pressing seams and folds; this guide adds the numbers.
What the iron dial means in degrees
Home irons are marked with one, two or three dots, the same code found on care labels. One dot is low heat and three is high, with two in the middle. Published maximum temperatures for each dot differ a little between standards. The American ASTM guide and the old Canadian standard use 110 C (230 F), 150 C (300 F) and 200 C (390 F).35 GINETEX, the international care-labelling association, now lists sole plate maximums of 120 C, 160 C and 210 C, which work out to about 248 F, 320 F and 410 F.2
Treat these as upper limits, not targets. Irons vary, and two dots on one brand may run hotter than two dots on another, so start every pressing session with a test on a scrap. The Proctor Silex manual allows two minutes for its iron to heat,4 and any iron takes longer than that to cool down. Turn the dial down before you need the lower heat, and work on cooler fabrics first when a project mixes fibers.
Temperatures and steam by fiber
The table combines the dot ratings from the Canadian guide and GINETEX with pressing advice from New Mexico State University Extension.123 Where sources disagree, the table takes the safer, lower setting.
| Fiber | Setting | Max (ASTM / GINETEX) | Steam | How to press |
|---|---|---|---|---|
| Nylon | 1 dot | 230 F, 110 C / 248 F, 120 C | Usually none | Wrong side, light pressure, press cloth |
| Acrylic | 1 dot | 230 F, 110 C / 248 F, 120 C | None | Wrong side or press cloth; never hold the iron still for long |
| Polyester | 2 dots | 300 F, 150 C / 320 F, 160 C | Yes, with care | Wrong side or press cloth; steam and a damp cloth help set creases |
| Silk | 2 dots | 300 F, 150 C / 320 F, 160 C | Light, on heavier silks only | Dry iron for sheers; press cloth for heavier weights |
| Rayon (viscose) | 2 dots | 300 F, 150 C / 320 F, 160 C | Not directly on the fabric | Moderate heat, press cloth |
| Wool | 2 dots | 300 F, 150 C / 320 F, 160 C | Yes | Never iron directly on wool; steam through a press cloth |
| Cotton | 3 dots | 390 F, 200 C / 410 F, 210 C | Yes, or dampen | Either side; press cloth if shine appears |
| Linen | 3 dots | 390 F, 200 C / 410 F, 210 C | Yes, with a damp cloth | Wrong side, highest setting |
Acrylic shows why one source is not enough. The Proctor Silex iron manual places acrylic on the medium setting alongside silk and wool,4 while both the Canadian guide and GINETEX put it on the low setting.23 Acrylic softens and melts when overheated,6 so start at one dot. The same manual says steam should only be used at the high setting,4 a reminder that low settings on many irons are not hot enough to make dry steam and may spit water instead.
For blends, set the iron for the fiber that tolerates the least heat.1 A wool and nylon blend goes at one dot, not two.
Press cloths and the right moisture
A press cloth is a piece of fabric laid between the iron and your project. It spreads the heat and holds moisture for steam pressing. It also keeps the sole plate from polishing the fabric surface into a shine.1 A plain, undyed cotton cloth about 12 x 18 in (30 x 45 cm), such as a piece of muslin or an old cotton tea towel without a pattern, works for most jobs. Silk organza makes a good see-through press cloth for delicate fabrics because it takes high heat and lets you see what is underneath.
Moisture helps natural fibers relax and take a new shape. Cotton and linen press best slightly damp; spray them lightly or dampen the press cloth and wring it until it no longer drips.1 Wool responds well to steam and can be shaped with it, which is how tailors shrink extra fullness out of a sleeve cap or a curved hem.1 Synthetics respond less to moisture and more to heat and pressure, so the aim with them is the lowest heat that still gives a crisp result.
Velvet and corduroy are the exception, because flat pressing crushes their pile. For these, hold the steaming iron about 1/2 in (12 mm) above the surface instead of setting it down, then brush the pile gently while it is still damp.1
Pressing seams open or to one side
Before you open a seam, press it flat exactly as it was sewn, with both seam allowances together. This sets the stitches into the fabric and smooths any small puckers.1 After that, decide which way the allowances (the fabric between the stitching and the cut edge) will go.
To press a seam open, you separate the two allowances and laying them flat on either side of the stitching. The result is the flattest, least visible seam from the outside, and it is the usual choice for side seams on trousers and skirts.1 Pressing to one side means turning both allowances the same way. It is used for seams that will be topstitched, for enclosed seams, and for gathered seams; a gathered skirt's waist seam is pressed up toward the bodice or waistband.1 When the two allowances differ in fullness, the fuller one goes against the flatter one.1
Press every seam before another line of stitching crosses it, and never press over pins, which leave marks and can melt into synthetics.1 Practise on a machine seam allowance sample before trying it on a garment.
Tools that make curves easier
Straight seams press fine on a flat ironing board, but curves need something curved underneath. A pressing cushion or seam roll (a firm, sausage-shaped pad) supports darts and sleeve caps along with other curved seams, and lets you press a seam open without the edges of the allowances printing through to the right side.1 A tailor's ham is a firmer, ham-shaped cushion with different curves on each end, used for the rounded areas around a bust dart, a hip curve or a collar.
A wooden clapper (a smooth block of hardwood) is pressed down on a seam right after steaming. It holds the heat and moisture in while the fabric cools, which gives a sharp, flat edge on wool and heavy cottons without extra heat.1 A thick terry towel folded on the board protects raised surfaces such as embroidery or quilting; press them face down into the towel.1 Cut strips of brown paper slipped under seam allowances stop ridges from showing through on the outside.1
Worked example: a hem on a 65/35 poly-cotton blend
A common work shirt or school skirt fabric is 65% polyester and 35% cotton. Cotton could take three dots, but polyester cannot, so the iron goes to the polyester setting: two dots, which is a maximum of 300 F (150 C) by the ASTM figure.15 Suppose the hem is a double fold on a skirt with a 40 in (102 cm) lower edge: first fold up 1/4 in (6 mm), then fold up again 1 in (2.5 cm).
Test first. Cut a 2 x 6 in (5 x 15 cm) strip from the leftover fabric. Fold it, press for 5 seconds at two dots without steam, lift and let it cool for 10 seconds. If the fold barely holds, try again with steam and a lightly damp press cloth, which helps polyester take a crease.1 Look at the strip under a lamp at an angle; any glossy patch means the iron was too hot or pressed too long on the bare fabric.
Press the first 1/4 in fold all the way around. If your iron covers about 4 in (10 cm) of hem at a time, a 40 in edge takes roughly ten placements. Lift and lower each time; do not slide. Then press the 1 in fold the same way, using a seam gauge to check the depth every few inches. Let each section cool before moving it, because poly-cotton sets its shape as it cools.
After stitching the hem by machine with the steps in machine hemming, or by hand with a blind hem, press once more from the wrong side. If you need to touch the right side, put the press cloth over it first.
Preventing shine and scorch, and common mistakes
Shine appears when heat and pressure flatten fabric until it reflects light. Scorch, usually yellow or brown marks, means the fiber has started to burn. Natural fibers such as cotton, linen and wool do not melt but can scorch in high, dry heat, while polyester, acrylic and nylon can soften, glaze or melt.6 Silk yellows if the iron is too hot.6 Too much heat, steam or pressure can also dull a surface even without visible damage.1
- Sliding the iron along a curved or bias seam, which stretches it out of shape.
- Pressing the right side of dark cotton, wool or polyester without a press cloth.1
- Using a dial setting from memory on a new or borrowed iron instead of testing a scrap first.
- Leaving the iron at three dots after pressing cotton and then moving straight on to a synthetic lining.
- Pressing over pins or basting knots, which leave dents that may not steam out.
- Flattening a textured fabric such as seersucker or crinkle cotton, whose puckers are meant to stay.1
If a shine does appear on wool, hold a damp press cloth over it and steam lightly with the iron just above the cloth; the fibers can sometimes lift back. A scorch on a synthetic is permanent, so the test strip is worth the two minutes it takes.
Sources
- Pressing Pointers (Guide C-309), New Mexico State University Cooperative Extension Service
- Care symbols, GINETEX
- Guide to Apparel and Textile Care Symbols, Office of Consumer Affairs, Innovation, Science and Economic Development Canada
- Iron use and care guide, models 17130 and 17150, Hamilton Beach Brands (Proctor Silex)
- Guide to Apparel/Textile Care Label Symbols, Eurofins
- Understand Your Fibers, University of Georgia Cooperative Extension
Links were checked when this guide was last reviewed. If one has moved, please let us know. How sources are chosen: editorial policy.